Sleep better with simple Yoga poses


If you usually do not get a good sleep at night, there are chances that you might be aging faster than you should. You may not exactly feel at the top of the world, and your thinking could be confused and muddled. When we sleep, our body repairs on a cellular level and removes toxins. Therefore, it is necessary to get at least six to eight hours of good sleep daily.

If you are unable to get enough good sleep, yoga can help. Regular practice of yoga is known to help alleviate several ailments, including insomnia and abnormal sleeping habits. The following yoga stretches can help you relax and enjoy a peaceful and great sleep:

  • Standing forward bend (Hastapadasana)
  • Cat stretch (Marjariasana)
  • Child pose (Shishuasana)
  • Butterfly pose (Baddhakonasana)
  • Legs-up-the-wall pose (Viparita Karani)

Yoga poses for a sound sleep:

1. Standing forward bend (Hastapadasana)

This pose stretches the back muscles, makes the spine supple and invigorates the nervous system by increasing blood supply.

Yoga for sleep


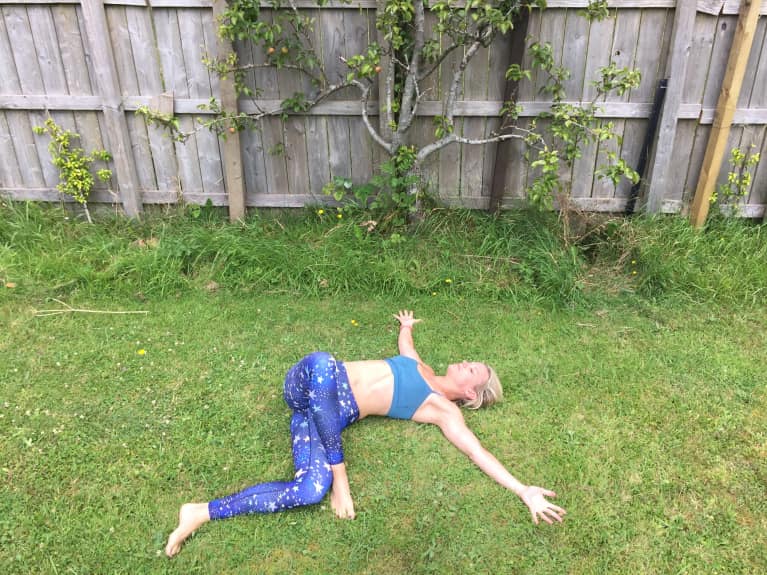
2. Cat stretch (Marjariasana)

An excellent stretch for making the spine flexible, the Cat stretch also massages the digestive organs and improves digestion, helping you sleep well. It also improves blood circulation and relaxes the mind.

yoga exercise for insomnia


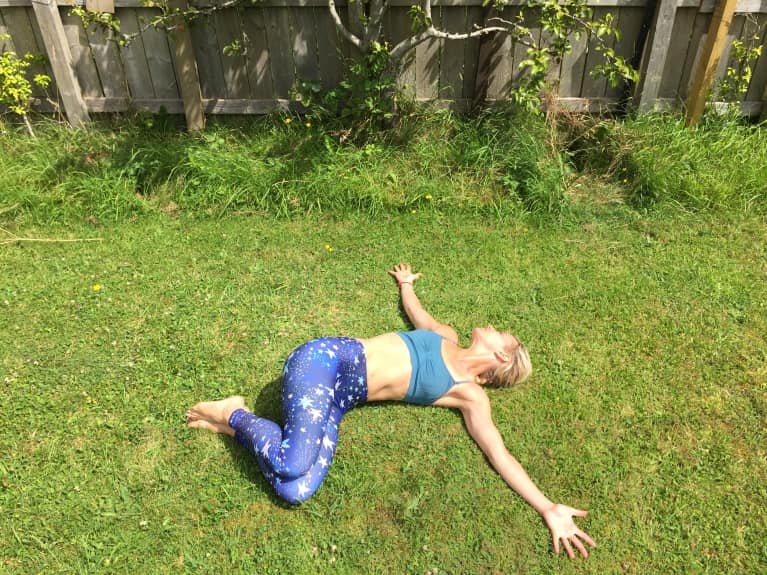
3. Child Pose (Shishuasana)

A deeply relaxing stretch for the back, this pose also helps calm the nervous system and aids you in sleeping peacefully.

yoga for sleep disorder


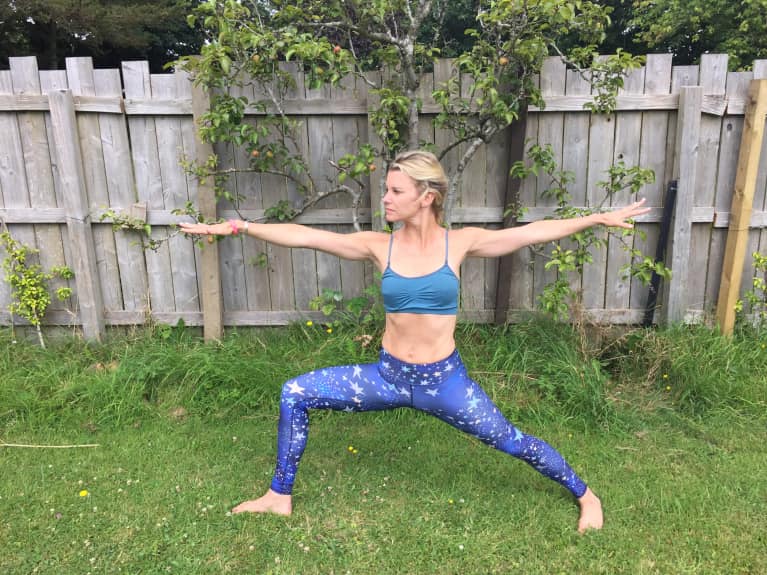
4. Butterfly pose (Baddhakonasana)

yoga poses to induce sleep

This pose can help remove fatigue from long hours of standing or walking. It is a good stretch for inner thighs, groin, and knees.

5. Legs-up-the-wall pose (Viparita Karani)

Lie down straight on your back. Now lift one leg up, followed by the next, and let your feet rest on the wall Extend the arms along the sides, palms facing up.

Now close your eyes and keep taking deep breaths as you relax into the pose. You may use an eye cushion over your eyes to block the light and completely relax. Stay in the pose for as long as you comfortably can and then slowly come out, bringing the legs down.

This is an excellent pose to relieve tired legs and feet. It also helps increase blood supply to the brain, thereby calming the mind and relieving it of a mild headache.

Besides these yoga poses, lying down in Corpse pose (Shavasana) and doing Yoga Nidra after meals help relax the body.

Sleep experts often point to the importance of creating a standard nighttime routine to signal your body that it’s time to prepare for sleep. You may choose to include Nadi Shodhan pranayama in your ritual to relieve tension and relax into a peaceful sleep.

Other tips to help you sleep better

  • Avoid doing Bhastrika pranayama and Sudarshan Kriya in late evenings. They will fill you with a lot of energy and prevent you from falling asleep.
  • Avoid watching a horror movie late night, as the thought of it will keep lingering in your mind.
  • Listen to soft instrumental music such as veena or chanting or some knowledge talk before getting ready to sleep.
  • Sleeping in the afternoon for about half an hour and at night for six to eight hours is a good practice.
  • Introspect on what you did during the day. Feel content, pray and go to sleep with a happy and relaxed mind.
  • Finish your dinner latest by 8:30 p.m. Keep a gap of at least two hours between your last meal and bedtime.
  • If you had a quarrel with your partner or loved one, make sure you sort it out before you go to sleep.
  • Avoid taking stimulants at night, especially if you are suffering from insomnia.
  • Meditate or do Yoga Nidra before going to sleep. This will help you relax and assist in getting sleep.

Yoga poses for full-body detoxification


Get fit this New Year with these yoga poses

Get fit this New Year with these yoga poses

With New Years on the horizon, let’s not forget that it’s time for some self-indulgence. And, what better, than a way to ensure that these celebrations are rubbed off in the healthiest ways? Let’s pledge that instead of welcoming this New Year with bloated body, sluggish feeling, and disastrous hangover after hours of dumping our bodies with sweets, alcohol, and junk food, we will kick-start the coming year with fitness and health.

Benefits of yoga

2/10
2

Benefits of yoga

In yoga practice, it is believed that each new breath is a new moment. The best way about yoga is you can start with it anytime, anywhere, like literally! These yoga poses for detox would see increased energy, balanced hormones, improved digestion, and weight loss, apart from feeling fabulous. Read on to know which yoga poses can ensure you spiritual detoxification!

Revolved chair pose

3/10
3

Revolved chair pose

You can start it right away while reading this. All you need to do is imitate a chair pose and bring your hands together at heart centre. Now breathe in to lengthen spine, and breathe out while twisting to the right (take left elbow outside of right thigh). Now repeat the breathing and start twisting on your left. Try this just 5 times a day on each side. This yoga pose is excellent in aiding digestion and stimulates the removal of toxins, while toning your abdominal wall.

Locust pose

4/10
4

Locust pose

A great pose to strengthen your spine and correct your back posture. Just lie down on your stomach with your hands in parallel to your legs, touching your hips. Now pull your head in upward pose, simultaneously pulling your feet and knees off the ground. Count 10 and then relax. Repeat this 5 times a day. The pressure on you abdomen encourages digestion, thus stimulating the release of unwanted things within your body.

Spine twist

5/10
5

Spine twist

This pose helps you relieve stress and detoxify your entire system. It initiates removal of unwanted toxins from your body, and stimulates fresh blood flow. Lie on your back with feet stretched outward. Now bring your palms at your shoulder level. Take a deep breath and pull your left leg over your right leg, and stretch your upper body in the opposite direction; twisting your spine. Stay in this position for at least five deep breaths, and then relax. Now repeat 5 times on each side.

Wide-legged forward bend

6/10
6

Wide-legged forward bend

Stand with your legs wide apart, matching exact distance with your shoulders. Now start bringing your head to touch the ground while slowly expanding the distance between your legs. Embrace pain only if your body allows. It is not necessary to be able to head-touch the ground on your first day. Keep your efforts till the time you achieve this position. This folding pose squeezes the belly stimulating speedy digestion and circulation of blood throughout the body.

Three-legged downward facing dog pose

7/10
7

Three-legged downward facing dog pose

All you have to do is stretch your hands, and steep your head inward below you heart, and stretch out your hips and legs outward. Now lift your left leg in the air in the downward dog pose and take deep breaths. Now repeat the breathing with right leg in the air. Try this out 5 times with each leg. This pose helps you mentally detoxify and stimulates the release of stress, sadness, depression and fear.

Plow pose

8/10
8

Plow pose

This yoga pose requires you to lie straight on your back with arms by your hips. Now take a deep breath and pull your legs straight above your chest level, and slowly try to touch the ground by your head. Keep trying until you succeed. At first your belly might not approve, but soon it will give in, trust me. Benefits of this pose include, back muscle stretching, posture improving, proper functioning of ovaries, bladder and kidney. It also increases metabolism.

Shoulder stand Pose

9/10
9

Shoulder stand Pose

Another pose that will help you instantly help you in cleansing your body off toxins. Start with lying on floor on your back. Bring your legs to your stomach now stretch them upward. Now bring your hands to support either side of your spine and help pull your belly in right angle position with the ground. Stay in this pose for 5 deep breaths, and then relax. Now repeat this 5 times.

Boat pose

10/10
10

Boat pose

Want to lose that belly layer fast then try out this excellent pose that also helps in solving breathing problems. Sit down with your knees bent, and pull back your spine to touch the ground. Once you achieve this position, stretch out your legs outward. Now pull your upper body to touch your feet. Keep trying till you achieve the boat pose. Hold on for 20 second and then release your legs. Try this 5 times.

For all book lovers please visit my friend’s website.
URL: http://www.romancewithbooks.com

Reduce Inflammation With These 3 Simple Yoga Poses


Inflammation in the body is a natural process of the immune system responding to infection, injury, stress, and more. As part of a healthy system, inflammation can actually be a good thing and help to combat small problems.

However, when inflammation is prolonged and becomes chronic, it can have some serious health implications. Chronic inflammation can lead to the development of chronic diseases as well as causing visible signs of aging.

In addition to generally caring for your body, working to reduce stress, and eating a healthy diet, you can also protect yourself against chronic inflammation with yoga.

Yoga is fantastic for decreasing stress levels, and research has also shown that those who practice yoga regularly have higher levels of leptin and adiponectin in their bodies. Both of these natural chemicals work to alleviate inflammation in the body.

Here are three poses that will kick inflammation to the curb.

Twisted Figure 4 Pose

This is a restorative pose that works to soothe the nervous system and promote healing in the body — both of which are great for combating inflammation.

Restorative poses are favored for their ability to promote calm throughout body and mind, making them some of the best go-to poses for inflammation prevention and relief.

To enter this pose, lie on your back with your knees bent and you feet firmly on the ground. Move your right ankle to your left knee and then allow both legs to come down across to the left of your body. You must then rest the sole of your right foot on the floor as your right knee points upward. You should allow your pelvis and your lower back to relax as you gently stretch your hips.

Hold this pose for one minute before returning to the start position and repeating on the other side.

Warrior II Pose

This pose is perfect for tackling inflammation as it helps to relieve muscle aches while improving circulation and respiration. When your circulation and respiration are at an optimum level, your body is much better equipped to combat stress and function effectively.

Begin this pose in tadasana with your feet approximately 4 feet apart. Raise your arms parallel to the floor, with your palms facing down, and then extend both arms out to either side so that your shoulder blades open. You can then turn your right foot out 45 degrees and keep your left foot parallel to the back of your mat or space.

Your right heel should be aligned with your left heel. Slightly tense the muscles in your thighs and then bend until the right kneecap is in line with your right ankle. Stretch both arms away from the shoulder blades, keeping them parallel to the floor. Feel your tailbone push down slightly as you keep your gaze focused on your fingers to your right.

Hold this pose for 1 minute, inhaling and exhaling deeply as you do so, before returning to tadasana and repeating on the other side.

Supine Twist

This pose is great for your digestive health, which is very much connected to your immune system response and therefore also the occurrence of inflammation. This pose is especially useful for alleviating inflammation in the lower back as well as working to release any tightness in the shoulders. For these reasons, this pose is perfect for those of you who work a desk job!

Enter this pose by first lying on your back on the ground. Bend your knees, but keep the soles of your feet on the floor. You can then lift your hips off of the floor and move them slightly to the right of your body as you bring your knees up to your chest.

Drop your knees to the right side of your body as you open both of your arms in line with your shoulders. Turn your head to face your right shoulder before you bring your knees back to your chest and drop them to the left side. Hold the pose in this position for between 30 seconds and one minute before returning to a neutral position and repeating on the other side.

6 Yoga Poses To Avoid During Pregnancy


Pregnancy is not the time to push yourself to new yoga heights or to even do what you were capable of before getting pregnant. The goal of yoga during pregnancy is to maintain flexibility, alleviate aches like lower back pain, reduce stress and anxiety, develop breath control and to give you bonding time with your baby.

Don’t forget that your body is working hard to nurture and allow your baby to grow.  Do as much as you can, and don’t feel bad if you choose to take a nap instead!

Yoga Poses To Avoid During Pregnancy

Avoid these types of Yoga poses during pregnancy:

1. Fast Flowing Poses Or Jumping From One Position To Another

Conception is followed by a whole whirlwind of events to form complicated organ systems and body structures. In the first trimester, the upward moving energy gets disturbed and many women experience nausea.

During this time, avoid doing yoga asanas or sequences quickly. Grounding and more restorative postures are better for supporting the growing fetus and will help with the complications that could arise during this time.

Centering poses will balance and regulate the body’s energies to move in their appropriate directions.

Poses To Avoid/Modify: Fast flowing or jumping from one pose to another.

2. Twisting Or Compressing Poses

After the embryo implants itself in the uterus at around week 4 of pregnancy, the placenta begins to form and eventually attaches to the uterine wall. Pay attention now and moving forward in your pregnancy to twisting or compression of the abdominal wall.

As pregnancy progresses, many asanas can start to feel restrictive and uncomfortable. Avoid or modify poses that compress the belly, as this can potentially decrease circulation or compress blood vessels and nerves that connect to the uterus.


Poses To Avoid/Modify: Boat Pose, Spinal Twist towards the Knees, Moon Posture

3. Prone Poses

As you progress during your 9-month journey, it will get harder to not notice your growing bump. As the baby grows, it places pressure on the surrounding organs and squeezes them.

During this time avoid prone postures and do not lie down on your stomach. This would place additional pressure on the stomach and organs.

Poses To Avoid/Modify: Cobra Posture, Locust Posture, Bow Posture, Swan Posture

4. Extreme Stretches

It’s important to pay attention to extreme stretches as you progress into the late second and third trimesters. As the secretion of relaxing increases, the ligaments soften.

In preparation for birth, your body experiences increased flexibility. Because the joints are softer and more malleable, it can lead to pelvic and joint instability and/or pulled ligaments.

Focus on stabilizing your body in each asana. Be especially aware of your knees.

Poses To Avoid/Modify: Wheel Posture, Fish Posture, Camel Posture

5. Inversions

By the third trimester, your baby may have settled into your pelvis. With your growing baby, your center of gravity has changed significantly as well. Doing extreme inversions can cause dizziness in the mother. Be careful when doing these.

There are specific times when extreme inversions can help you and it is recommended that you only do it under the recommendation of an experienced professional.

Poses To Avoid/Modify: Downward facing Dog posture, Shoulder or Headstand, especially if you were not proficient prior to pregnancy

6. Lying Flat On Your Back

Many yoga teachers may say do not lie on your back – even though for some, it may feel lovely! But lying flat on the back for an extended period of time can compress the inferior vena cava.

This is an important vein that returns deoxygenated blood from the lower body back to the heart. It can also aggravate lower back pain, heartburn, and elevate blood pressure.

It is okay to lie on your back for some time, but you should follow how you feel. Change positions if you start to feel nauseous, dizzy, or uncomfortable.

Poses To Avoid/Modify: Corpse Posture

Each person has her own challenges that arise during pregnancy. Depending on what these are, you can either include or avoid certain asanas during your pregnancy. It is always important to consult with a certified yoga teacher or an ayurvedic practitioner during this time.

What Are the Best Yoga Poses for Breast Cancer Patients?


Breast cancer and its treatment may cause symptoms such as fatigue, nausea, decreased range of motion, and weakness. Exercise and other integrative therapies, including yoga, can ease these symptoms, help patients feel better during treatment, and can be scaled to fit each patient’s unique needs and abilities.

“Yoga has many physical and emotional benefits for all cancer patients,” says Ann Marie Turo, OTR/L, yoga instructor in Dana-Farber’s Leonard P. Zakim Center for Integrative Therapies, where she teaches chair yoga, Hatha yoga, Pilates, yogalates (yoga and Pilates fusion), and foot fitness classes. For breast cancer patients, who might experience lymphedema following surgery or radiation, Turo says yoga can help restore range of motion in the arms and improve strength and mobility. Yoga can also reduce stress and anxiety, which in turn can lower heart rate and blood pressure.

“Research has increasingly shown that breast cancer patients who practice yoga experience many benefits, including increased energy, diminished anxiety, and better overall quality of life,” says Jennifer Ligibel, MD, a breast oncologist in Dana-Farber’s Susan F. Smith Center for Women’s Cancers and director of the Zakim Center. “The mission of the Zakim Center is to provide patients access to integrative therapies with proven benefits, such as yoga, to help support healing during and after cancer treatment.

Specific benefits of regular yoga practice include increased body awareness; improved cardiovascular, respiratory, and bone health; better blood flow; and enhanced mood, sleep, and concentration, which are often compromised during treatment.

“Yoga is a feel good exercise,” adds Turo. “And it’s a tool you can use anywhere – in bed, sitting on a chair, or on a mat.”

Turo recommends easing into a yoga routine, and some of her favorite poses can be done in a chair or at a desk. View the infographic below for a step-by-step guide to stretches that will help increase range of motion and body awareness following breast cancer treatment.


Yoga for cancer patients infographic