High Blood Sugar Control: 5 Simple Yoga Asanas That can Help Manage Diabetes


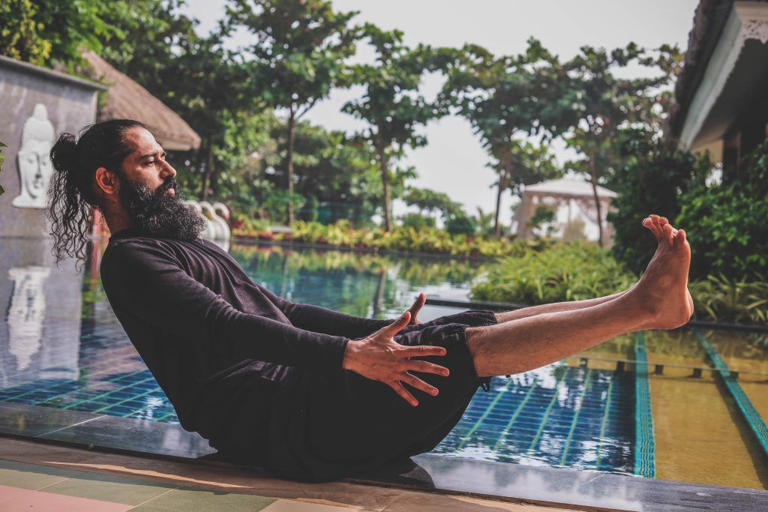
High blood sugar is one of the root causes that can lead to several health issues and impact organs. It’s important to holistically manage diabetes and practising yoga asanas regularly can be very helpful. Here are 5 asanas that are particularly beneficial for people with diabetes.

  • If the body has too little insulin or if it can’t use insulin properly, it leads to high blood sugar or diabetes
  • Yoga asanas can help those with diabetes to maintain their blood glucose levels and lead a healthy life
  • Experts suggest to practise these asanas regularly but one should check with medical experts before starting a new exercise regime

High Blood Sugar Control: 5 Simple Yoga Asanas That can Help Manage Diabetes

Diabetes occurs when glucose or sugar levels in the blood remain elevated. The food we eat gives us glucose and the insulin hormone helps transport this glucose into our cells so they can get energy from it. If the body has too little insulin or if it can’t use insulin properly, it leads to high blood sugar or diabetes.  

Apart from your diet and medicines, practising yoga can go a long way in managing your diabetes. Himalayan Siddhaa Akshar, founder, Akshar Yoga Institutions, Himalaya Yoga Ashrama, World Yoga Organisation, shares, “Yoga asanas stretch the internal organs with a range of twisting poses. As a result, blood flow increases and the organs receive more oxygen, which enhances their functionality. The endocrine system performs better as a result.”

High Blood Sugar: Here are some Yoga Asanas to practise if you have diabetes

Yoga expert Himalayan Siddhaa Akshar lists the following Yoga asanas for diabetes:

1) Marjariasana (Cat-Cow Pose) 

Urdhva Mukhi Marjari Asana

Kneel down with your knees under your hips and your palms under your shoulders. Breathe deeply, arch your back, and look upward.

Urdhava-Mukhi-Asana

Adho Mukhi Marjari Asana

Breathe out, arch your back, and tuck your chin into your chest. Fix your attention on your navel.

adho-mukhi-marijasana

2) Paschimottanasana (Seated Forward Bend)

The first thing to do is to extend your legs forward. When doing this, make sure your knees are slightly bent. Lift your arms up while maintaining a straight spine. Start bending forward at the hips as you exhale, placing your upper body on your lower body. Put your fingertips everywhere you can reach, such as your big toes.

Word of caution:  Practitioners who are pregnant, have sliding discs, suffer from sciatica, have asthma, or have an ulcer shouldn’t perform Paschimottanasana.

Paschimottanasana

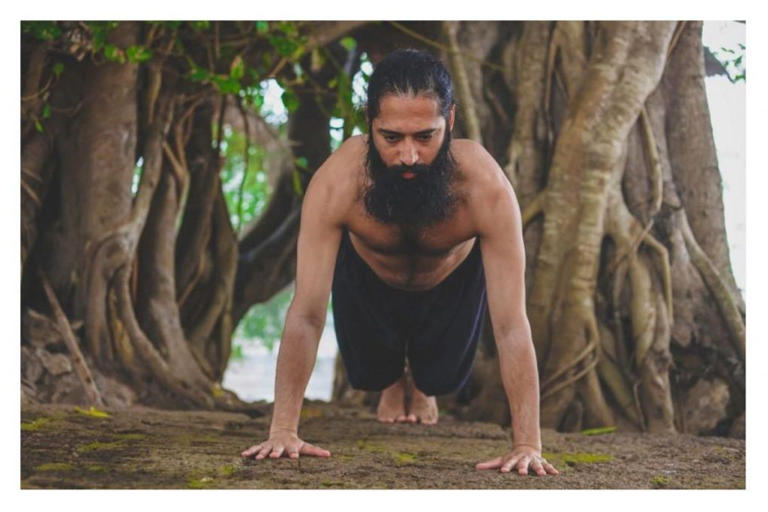
3) Ado Mukha Svanasana (Downward Dog)

Begin by getting down on all fours and placing your knees underneath your hips and your palms beneath your shoulders. Extend the elbows and knees while raising the hips. Apply pressure to your palms while opening your shoulder blades. Try to plant your heels firmly on the ground. Keep your focus on your big toes. 

Word of caution: Avoid doing this position if you have diarrhoea or carpal tunnel syndrome. Avoid holding this position if you are pregnant or close to becoming pregnant. Avoid this asana if you move slowly, have high blood pressure, have a headache, or have a recent or persistent arm, hip, shoulder, or back injury.

Adho-mukha-svanasana

4) Balasana (Child’s Pose)

Kneel on the mat while sitting upright on your heels. Exhale while bringing your arms up above your head and bending your upper body forward. Put your forehead on the ground while supporting your pelvis on your heels. Ensure that your back is not arched.

Balasana

5) Mandukasana (Frog Pose)

As you sit in Vajrasana, extend your arms in front of you. As you ball your fist, your remaining four fingers should be positioned above your thumbs. Bend your arms at the elbows and put your balled-up fists over your navel. You should have your upper body bowed and above your bottom body. Looking forward while extending your neck.

Word of caution: Pregnant ladies should avoid performing this pose. If a person has ankle pain or injury or has just undergone ligament surgery, they should avoid this position. If one has ulcer issues, this stance must be avoided. If you have knee or back issues, kindly refrain from performing this pose.

Hold each position for three sets of 30 seconds. Practise each of these positions deliberately, take your time, and focus on your breathing while you hold each one.

Mandukasana

Yoga For Weight Loss: 6 Asanas to Help You Burn Belly Fat


Carrying around extra weight makes one feel heavy and lethargic causing slowness in their movements. Whether for men or for women, it is regarded psychologically that a toned and a fit body can add to the self-confidence quotient greatly.

Through the help of yoga, you can easily shed pounds or kilograms and feel both lighter and younger. When your body is used to physical fitness, it is active and energetic throughout the day. Accumulated fat also makes it harder to carry out many ordinary activities that come up normal like bending or squatting down to pick something off the floor. Abdominal obesity is a real danger when the waist measures 35 inches or more for women and 40 inches for men.

Practice these postures twice a day, once in the morning and later in the evening. Do this for 3-4 weeks consistently to begin seeing the results of your work.

Yoga Guru Himalayan Siddha, Akshar, Founder, Akshar Yoga Research and Development Centre shares 6 yoga asanas for weight loss.

Asanas

Santolanasana Plank Pose

Formation of the posture

  • Lie on your stomach
  • Place your palms under your shoulders and lift your upper body, pelvis and knees up
  • Use your toes to grip the floor and keep the knees straight
  • Ensure that your knees, pelvis and spine are aligned
  • Your wrists must be placed exactly below your shoulders with your arms kept straight
  • Hold the final posture for a while

Vasishtasana

Formation of the posture

  • Begin with Santholanasan (Plank)
  • With your left palm firmly on the ground, remove your right hand off the floor
  • Turn your entire body to face the right side and lift your right leg off the floor and place it over your left leg
  • Raise your right arm above and keep your fingers pointing to the sky
  • Ensure that both your knees, heels and feet are in contact with each other
  • Ensure that both arms and shoulders are in one straight line
  • Turn your head and look up at your right hand
  • Hold the asana for a while
  • Repeat the same on the left side

Hastha Uttanasana Raised-Arms Pose

Formation of the posture

  • From Pranamasan, raise your joint palms over your head and stretch upward.
  • Slightly tilt your head, neck and upper back to create a slight arch.
  • Ensure that your arms are beside your ears as you tilt your upper body back.
  • Focus your gaze towards the sky.

Padahastasana – Standing Forward Bend Pose

Formation of the Posture

  • From HasthaUttanasan, exhale and gently bend your upper body down from the hips and tuck your nose in-between your knees.
  • Place your palms on either side of your feet.
  • As a beginner, you may have to bend your knees slightly to accomplish this.
  • With practice, slowly straighten your knees and try to touch your thighs with your chest.
  • Allow your neck to fall with gravity and tuck your nose in-between your knees
  • Try to leave as little space between your upper and lower body as possible.
  • Ensure that your back does not form a hunch.

Naukasana

Formation of the posture

  • Lie down on your back
  • Lift up your upper and lower body to balance on your sitting bones.
  • Your toes must be aligned with your eyes
  • Keep your knees and back straight
  • Keep your arms parallel to the ground and pointing forward
  • Tighten your abdominal muscles
  • Straighten your back
  • Inhale and exhale normally

Ek Padasana

Formation of the posture

  • Begin with Samastithi.
  • Keep your back straight as you stretch your arms up and join your palms in Pranam.
  • Exhale and bend your upper body forward and until it is parallel to the floor.
  • Keep your arms beside your ears. Slowly lift your right leg upwards behind you, keeping it straight.
  • Your right leg, pelvis, upper body and arms should all form a straight line.
  • Focus your gaze on a point on the floor to maintain balance.

Along with these yoga asanas, you should definitely make some changes to what you eat. Sufficient sleep at night is another main factor that aids in weight loss. Eliminate stress, and follow a disciplined lifestyle. You can certainly achieve weight loss with a holistic practice like Yoga. The most vital point to remember is that by being regular and consistent with any fitness routine, you can achieve your goal.

3 pelvic-opening yoga asanas to regulate your menstrual cycle


Periods, the more common term for menstrual cycle, is a natural process that takes place in a female body in order to get rid of blood and tissues through the uterus. The menstrual cycle is the time between two consecutive periods and it is mostly 28 days but can be anything between 26-32 days. However, most women, due to today’s hectic lifestyle patterns, experience the problem of irregular periods, which means their periods are delayed by more than a week after the due date.

While a healthy diet and constant workout is the best way to regulate periods without any medications or pills, there are certain yoga asanas, as recommended by fitness trainer Juhi Kapoor, which can help improve your condition.

In her Instagram post, she mentioned how these asanas are great for pelvic opening, strengthening the pelvic and improving blood flow to the reproductive area.

Here are the three yoga asanas that you can try for regulating your menstrual cycle

1. Utkata Konasana or Goddess Squat

This yoga asana helps to open the hips and chest while strengthening and toning the lower body. It also stimulates the uro-genital, respiratory and cardiovascular systems for overall betterment of female health.

2. Skandasana or Side Lunges

It enhances your body balance and core strength apart from stretching the hamstrings and hips, which often get due to a sedentary lifestyle. Overall, it also helps to relieve back pain and prevent sciatica.

3. Malasana or Garland Pose

The well-known yoga pose not only improves balance and concentration, and focus but also increases circulation and blood flow in the pelvis. Not just menstruating women, it is particularly good for pregnant women as well.

All the three yoga asanas are highly recommended to treat PCOS and endometriosis, improve period flow, boost fertility in both men and women apart from leg toning and strengthening. These poses also ease the birth canal opening during delivery.

However, do not perform these asanas if you have knee, ankle and heel pain, or Arthritis. Also avoid doing them in the first trimester of pregnancy, and in the second and third trimester, use the necessary support of the wall or chair to maintain balance.