3 Breathing Exercises to Calm the Brain, Reduce Stress and Cure Anxiety


In Taoist philosophy it's taught that "The wise man/woman breathes from his/her heels." (tache/Shutterstock)

In Taoist philosophy it’s taught that “The wise man/woman breathes from his/her heels.”

When you breathe correctly, you pump cerebrospinal fluid into the brain to reduce stress and cure anxiety.

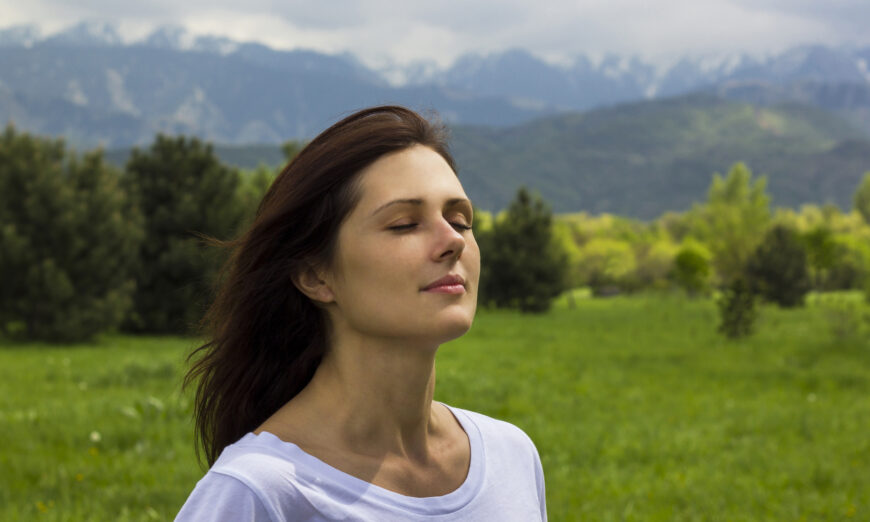
You’ve probably heard the expression, “just breathe through it.” When a situation is stressful, breathing deeply and evenly can help to cure anxiety and reduce stress. Why is that so? There’s a very important link between feeling calm, nasal breathing, better sleep, and brain health.

In Taoist philosophy, it’s taught that “The wise man/woman breathes from his/her heels.” Physically speaking, this phrase is a reference to the fact breathing deeply into the body is incredibly good for health. Today research is revealing how breathing affects the brain.

The human brain is bathed with crystal clear liquid called cerebrospinal fluid (CSF). CSF carries oxygen and nutrients to brain cells while removing waste products. Recent studies using magnetic resonance imaging show a link between CSF flow and breathing.

In this article, we’ll explore the process of breathing and how it affects the brain.

Cerebrospinal Fluid–The Brain’s Life Blood

Perhaps the most important fluid in your body is the 250ml of cerebrospinal fluid that flows around a system of pipes in the brain called the ventricles. Cerebrospinal fluid is produced by the choroid plexus in the third ventricle, and from there it circulates through the brain via the ventricles and then to the spinal cord.

Each day the entire volume of CSF is replaced four times. During sleep, the blood-brain barrier relaxes to let CSF into the neurons and flush out the build-up from the day. This is a big reason why sleep is so important.

How Breathing Affects the Brain and CSF

A good night’s sleep is easier said than done for some, but there are ways to get better sleep by breathing consciously. Breathing influences CSF flow dynamics by changing pressure in the chest. Recent studies have shown how breath can affect the flow of CSF directed through the ventricles of the brain. This is important because you need to make sure your brain gets the most CSF it can.

If you sleep badly or wake up feeling tired or anxious, then it might indicate a sleep disorder. Conditions such as snoring, sleep apnea, and other issues are known to affect CSF flow to the brain.

Studies show that pressure in the chest influences the pressure in vessels like arteries and veins. It was previously thought that changes in CSF flow responded to arterial pressure during deep inhaling, however, it was recently discovered that the direct change of pressure in the chest during breathing is likely responsible.

Diaphragmatic breathing affects the pressure of the veins around the thoracic vertebrae (located in the mid-back), and the veins in the chest respond to these changes in pressure by pumping CSF into the spinal cord.

Breathing Shifts CSF Via Pressure in Chest Veins

The veins around the chest vertebrae column transmit pressure upwards to the brain. They make up a sprawling network of tinier veins that extend up into the epidural venous system of the spinal canal called the venous plexus.

During inhalation and exhalation, the chest rises and falls. The change in pressure flows upward to the CSF dynamics around the brain. Here’s how it works:

Breath in (inspiration): Lowers chest pressure and empties the venous plexus. CSF flows down the spine.

Breath out (expiration): Increases chest pressure and fills the venous plexus, pushing CSF up the spine into the head.

As you can see, breathing conducts a rhythm of flow of CSF up and down the spinal cord.

Deep Breathing and the Brain

Most veins in the body have valves to stop blood from flowing backward. However, the thoracic plexus is valveless, and any pressure will cause a flow in either direction. More pressure from deep breathing causes more CSF to flow into the brain.

2013 study showed that the depth of breathing can even change the rate of CSF movement through the brain, with deeper breaths pushing CSF further up into the brain. Researchers also tested breath holding and found it also produces increased CSF flow.

Pressure changes of CSF likely then push CSF into the lymphatic system, so with each breath, CSF is flowing into your brain. The body then exits it into the lymphatic system to be met by the immune system.

Easy Breathing Tips for Better Sleep and Stress Reduction

Now we know how breathing bathes the brain in CSF, it’s important to know that how you breathe during your waking hours will be reflected in your breathing pattern while you slumber. Priming your body for good breathing during sleep may help nourish the brain in CSF.

For better sleep and a healthier brain, and to reduce stress and anxiety, practice the following breathing exercises.

Step 1: Deep Breath to Reduce Stress

  • Lay on the floor with two hands over your stomach.
  • Seal the tongue firmly to the roof of the mouth, seal the lips and breathe deeply through the nose.
  • Breathe deeply into the diaphragm. Your hands should rise as the stomach expands. Breathe in for 4 seconds.
  • Take a slow exhale for 8 seconds.
  • Continue for 30 breaths and repeat 3 times.

Step 2: Expand Your Breathing Capacity

  • Repeat the steps above, and when you reach your capacity, make a conscious effort to extend your breathing.
  • Lengthen the exhale to 10-12 seconds.
  • Feel the rush of CSF to your brain. As you expand you feel comfortable in slow, deep breathing.

Step 3: Improve Your Spinal Posture

Remember, CSF moves up the spine into the brain as you breathe. Your spinal posture will influence that pathway. Here’s an exercise to increase core mobility with standing Chi Gung. Hold the following posture for two minutes:

  • Draw the body’s weight to the middle of the feet, slightly away from the heels.
  • Extend your arms in front of the body.
  • With every breath as the chest expands, shift your body weight forward, taking additional weight off the heels.
  • To balance the forward motion, extend the spine and stretches through the heels.
  • Ensure the downward stretch and forward motion are exactly balanced so that there is no visible movement of the heels.
  • To an observer the heels appear to be in contact with the ground, but internally they are engaged in a downward stretch with each breath.
  • Feel the stability of the spine and visualize CSF flowing up the spine.

Your brain depends on deep breathing patterns to help bath it in cerebrospinal fluid. Using your diaphragm to maximize pressure shifts in the chest cavity will help to boost the flow of CSF to the brain.

6 Breathing Exercises And Yoga Poses To Raise Hemoglobin


Yoga To Increase Hemoglobin

A low level of hemoglobin leads to anemia, which in turn causes dizziness, fatigue, and headaches. You should try breathing exercises like shitali, nadi shodhan, and kapalbhati pranayama to increase the production of red blood cells. Follow these with yog poses like shoulder stand, half-shoulder stand, and raised foot pose.

Iron is an essential element for blood production. About 70 percent of your body’s iron is found in the red blood cells of your blood called hemoglobin. Hemoglobin plays an important role in transferring oxygen in your blood from the lungs to the tissues.

Generally, the signs of low hemoglobin include dizziness, headache, fatigue, and a feeling of tiredness. Sometimes, it can also be tough to concentrate. And while not many associate yoga with hemoglobin, yoga and pranayama or breathing exercises can indeed help increase the hemoglobin in your blood.1 Did you know most anemic patients are advised to start their yoga sessions with pranayama?

1. Shitali Pranayama

Steps

  • Sit comfortably cross-legged and with both hands on the knees.
  • Stick your tongue out, folding both sides of the tongue like a tube.
  • Inhale deeply through the tube made with your tongue.
  • After inhalation, close your mouth and exhale through your nostrils.
  • This can also be done by clenching your teeth and inhaling if you are unable to roll your tongue.

Precautions

  • This pranayama is not advisable for those having low blood pressure.
  • Heart and asthma patients should be careful as holding the breath may cause discomfort.
  • Always consult your general practitioner before beginning any yoga session.

2. Nadi Shodhan Pranayama

Steps

  • Sit comfortably with your spine erect and shoulders relaxed.
  • Place your left hand on the left knee. The index finger and the thumb should be gently touching at the tips and the palm should be open.
  • Place the tip of the index finger and middle finger of your right hand in between your eyebrows. The ring finger and the little finger should be on the left nostril and the thumb on the right nostril. These fingers on the left and right will control the opening and closing of the nostrils.
  • Press your thumb down on the right nostril and breathe out gently through the left nostril.
  • Now, breathe in from the left nostril and press it down with the ring finger and little finger. Remove the thumb from the right nostril and exhale.

Precautions

  • Do not force the breathing; keep the flow gentle and natural.
  • Do not apply pressure on the forehead with the fingers.
  • Your exhalation should be longer than your inhalation.

3. Kapalbhati Pranayama

Steps

  • Sit comfortably with your spine erect. Place your hands on your knees with the palms open.
  • Take a deep breath.
  • As you exhale, pull your stomach back in towards the spine. Do as much as you comfortably can.
  • You may place your right hand on the stomach to feel the abdominal muscles contract.
  • Take 20 such breaths to complete 1 round of kapalbhati pranayama.

Precautions

  • Avoid practicing this breathing technique if you have an artificial pacemaker or stents or a backache due to slip disc. Those who have had an abdominal surgery or are suffering from epilepsy or hernia should avoid this pranayama.
  • This pranayama should not be practiced during and shortly after pregnancy. It should be avoided by women during menstruation as it involves vigorous abdominal squeezes.
  • People with hypertension and heart problems should practice this with the guidance of a yoga trainer.


These breathing exercises are followed by the following yogasanas.

4. Sarvangasana (Shoulder Stand)

Steps

  • Lie down on a mat. Place the hands below the hips and elbows close to the body.
  • As you exhale, bend the knees and lift the hips off the floor.
  • When you inhale, straighten the legs and place them straight up.
  • Hold this position with the support of both your hands. Placing the elbows close to each other will help protect your back and will provide more stability.
  • If the entire position is not possible, do as much as you can but make sure the position is stable.
  • Exhale and bend the knees toward your chest.
  • Next, inhale and with the help of your hands bring the hips down.
  • When you come down from the straight position, make sure you don’t come down with a jerk.

Precautions

  • Menstruating and pregnant women are advised not to perform this yogasana.
  • It is important to consult a physician if you are suffering from high blood pressure, heart problems, glaucoma, slip disc, spondylosis, neck pain, and/or acute thyroid problems.

5. Viparitakarani (Half Shoulder Stand)

Steps

  • Lie down on your back.
  • Bring your legs together with your feet pointing upward.
  • Roll your legs over, lift your buttocks off the floor.
  • Place your hands below the buttocks.
  • Your weight is focused on your neck, shoulder, and elbows.
  • When you want to come back, take your legs over your head and bring your spine down slowly.
  • Finally, bring your legs down and relax.

Precautions

  • This asana is a mild inversion, and therefore, it must be avoided during menstruation.
  • Those with serious neck and back problems should perform this asana with the help of a yoga instructor.

6. Uttanpadasana (Raised Foot Pose)

Steps

  • Lie down on your back.
  • Keep your legs together and slowly raise the legs up bringing them to an angle of 90° with the ground. If you are not comfortable with this angle, you can also maintain an angle of 60° with the ground.
  • All kinds of jerks and movements of the legs should be avoided.
  • The toes should be together and stretched upward.
  • Continue normal breathing and try to maintain this posture.
  • Breathing normally, bring both the legs back down on the floor.
  • This can be practiced by raising one leg at a time as well.

Precautions

  • Pregnant women and menstruating women are advised not to perform this pose.
  • People suffering from severe backaches and high blood pressure should perform this after consulting your doctor.
  • People suffering from any other ailments should consult their general practitioner before performing any yoga pose.

Further, aerobic yoga improves the oxygen delivery capacity of the blood as the blood volume, the number of red blood cells, and oxygen-carrying hemoglobin increase.

These are only a few yogasanas and breathing exercises that can help increase low hemoglobin levels in the blood. Other breathing exercises may also help, including suryabhedana and shitkari. Other yogasanas that may help with the hemoglobin levels include trikonasana, halasana, pawanmuktasana, matsyasana, shavasana, and others.

View Article References (-)

1. Sinha, Anil. Common Remedies and Cures for the Common Diseases, Volume 1. Page Publishing, 2014.